How to Customize a Video Template in Clipcat (Quick Start Guide)
Contents
Video content creation doesn’t always have to be a time-consuming, manual process. With a beautiful template and the right use case, you can transform your production workflow into a sophisticated, automated system that delivers consistent results.
Some creators mistakenly believe that templates limit creativity and flexibility, but the truth is quite the opposite. A well-designed template can be your creative foundation—a set-and-forget solution that ensures professional output regardless of the input.
The secret? Strategic template design. By carefully crafting your template’s structure, transitions, and core design elements, you build a framework that adapts to different content types while maintaining a cohesive look and feel. The goal is to create a system where you can feed in various media, text, and other data for your template to automatically transform into a polished video—without requiring manual intervention at each step.
When you’re using Clipcat to autogenerate beautiful videos, template design is where you get to unleash your creativity and create something versatile that serves your needs. Keep reading to learn more about templates and how to set one up on your own!
Why Use Templates For Video?
Using templates in your content production process is ideal for recurring video needs like daily reports, client feature pieces, monthly deals, and highlighted products. Templates are more than just a design shortcut—they're a powerful tool for systematic content creation.
The core advantage of video templates lies in their ability to transform repetitive content production into a streamlined, scalable process. By establishing a consistent framework, you can:
- Save Time & Resources : Start with a pre-designed template or create one from scratch, and enjoy efficiency as you scale.
- Reinforce Brand Consistency : Create visual familiarity across a series of content by maintaining consistent design elements.
- Enhance Team Collaboration : Maintain control over shared assets and ensure compliance with creative guidelines.
- Automate Content Generation : Build workflows that enable automated video generation using templates, data collection, storage, and more.
- Diversify Content : Quickly create multiple video variations for different goals, platforms, or audiences without starting from scratch each time.
- Reduce Production Complexity : Maintain high production value while minimizing setup by pre-defining design elements, transitions, and structural components.
By leveraging templates, you transform video production from a time-consuming, manual process into a repeatable, automated workflow that can adapt to your evolving content needs.
How to Set Up Your First Clipcat Template
Clipcat’s API enables you to generate videos programmatically using a template. Log into your account (or start a free trial and get 100 credits—no credit card required! 🎉) then follow these steps:
1 - Add a Template to Your Account
Start generating videos by adding a template, either by selecting one of our pre-designed selections from the library or creating one from scratch.
From the Library
Click the Library tab and browse through the selections. We have a wide variety of options and are constantly adding new designs, from Airbnb reviews to breaking news headers.

When you’ve settled on a template, click to automatically add it to your own template page.
Meow Memo 🐱: Need feedback from your team? Click the three-dot menu next to a public template, then click Share Template. This will lead you a shareable URL that displays a preview of the video and a sample API payload.
From Scratch
From the Library tab, click Start with a Blank Template.
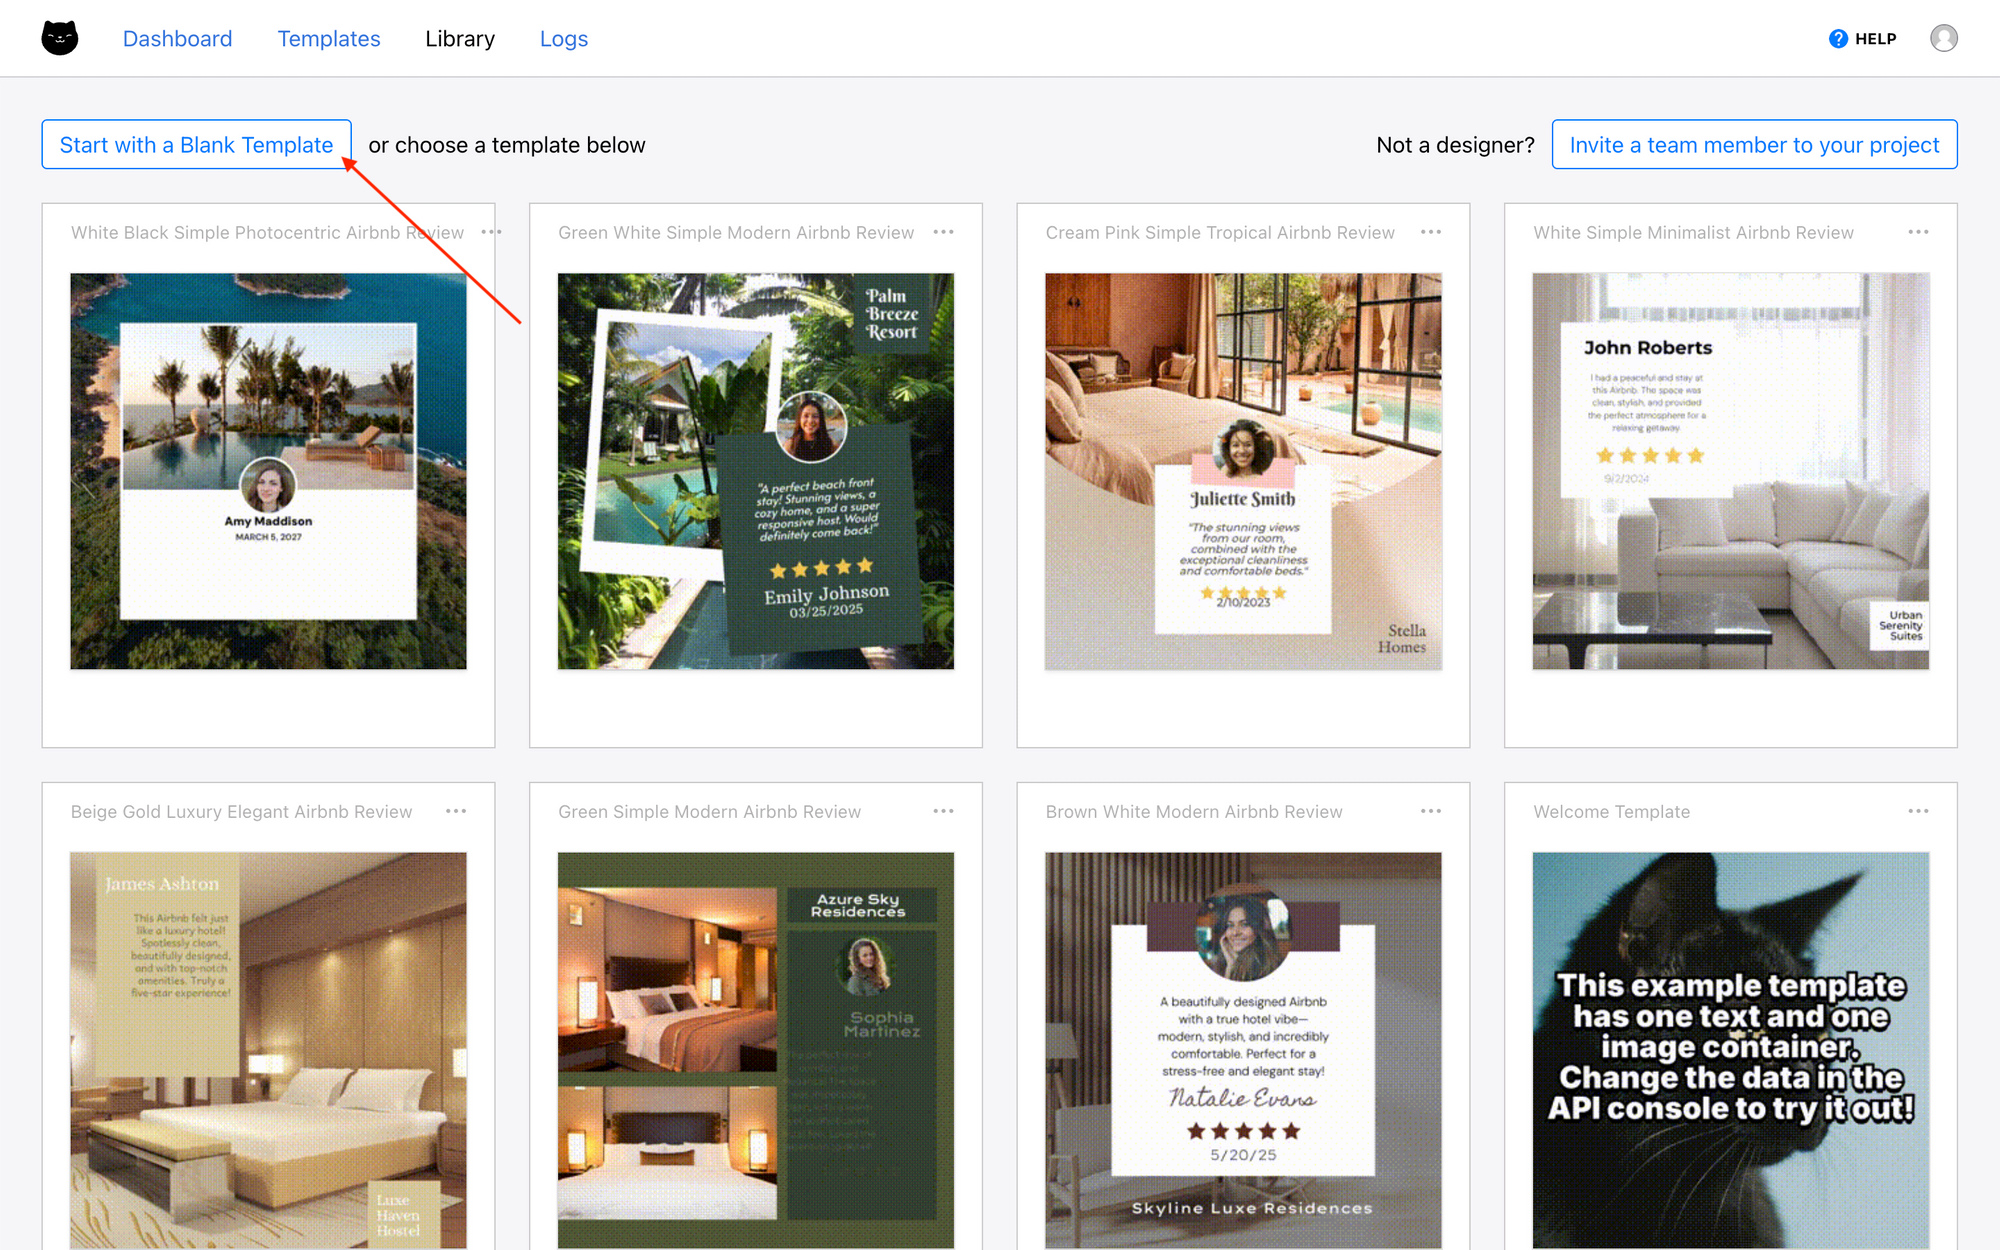
Alternatively, from the Templates tab, click Create a Template.
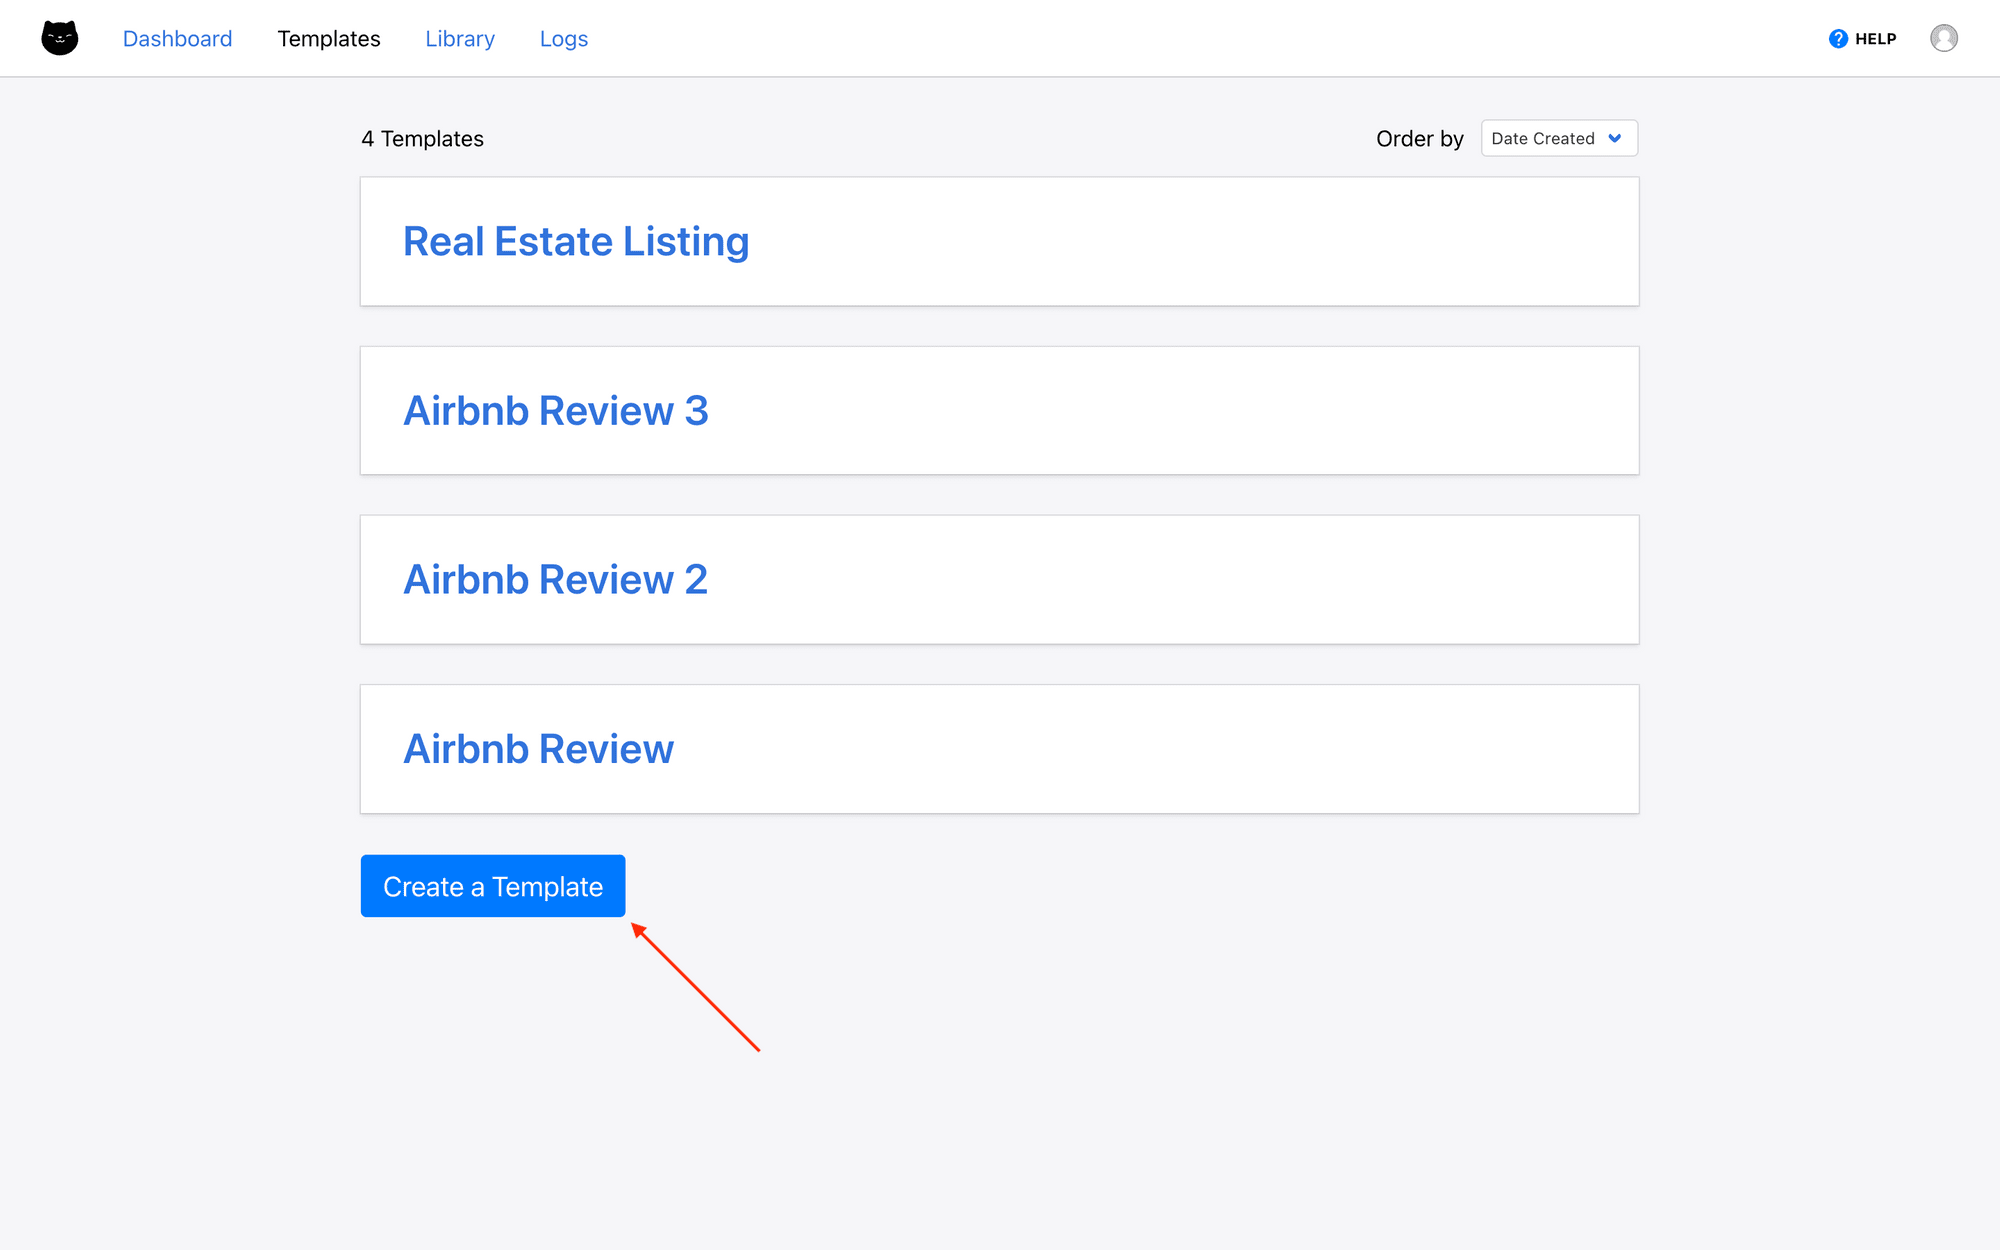
All of your Clipcat video projects can be found under the Templates tab. You can browse through and sort them as needed. Clicking one leads you to a template page, where you can modify each individual template, access the editor, manage integrations, and use the API console.
2 - Open the Template Editor
Go to your template page. Here, you’ll see a preview of the template, the API console, and renders created.
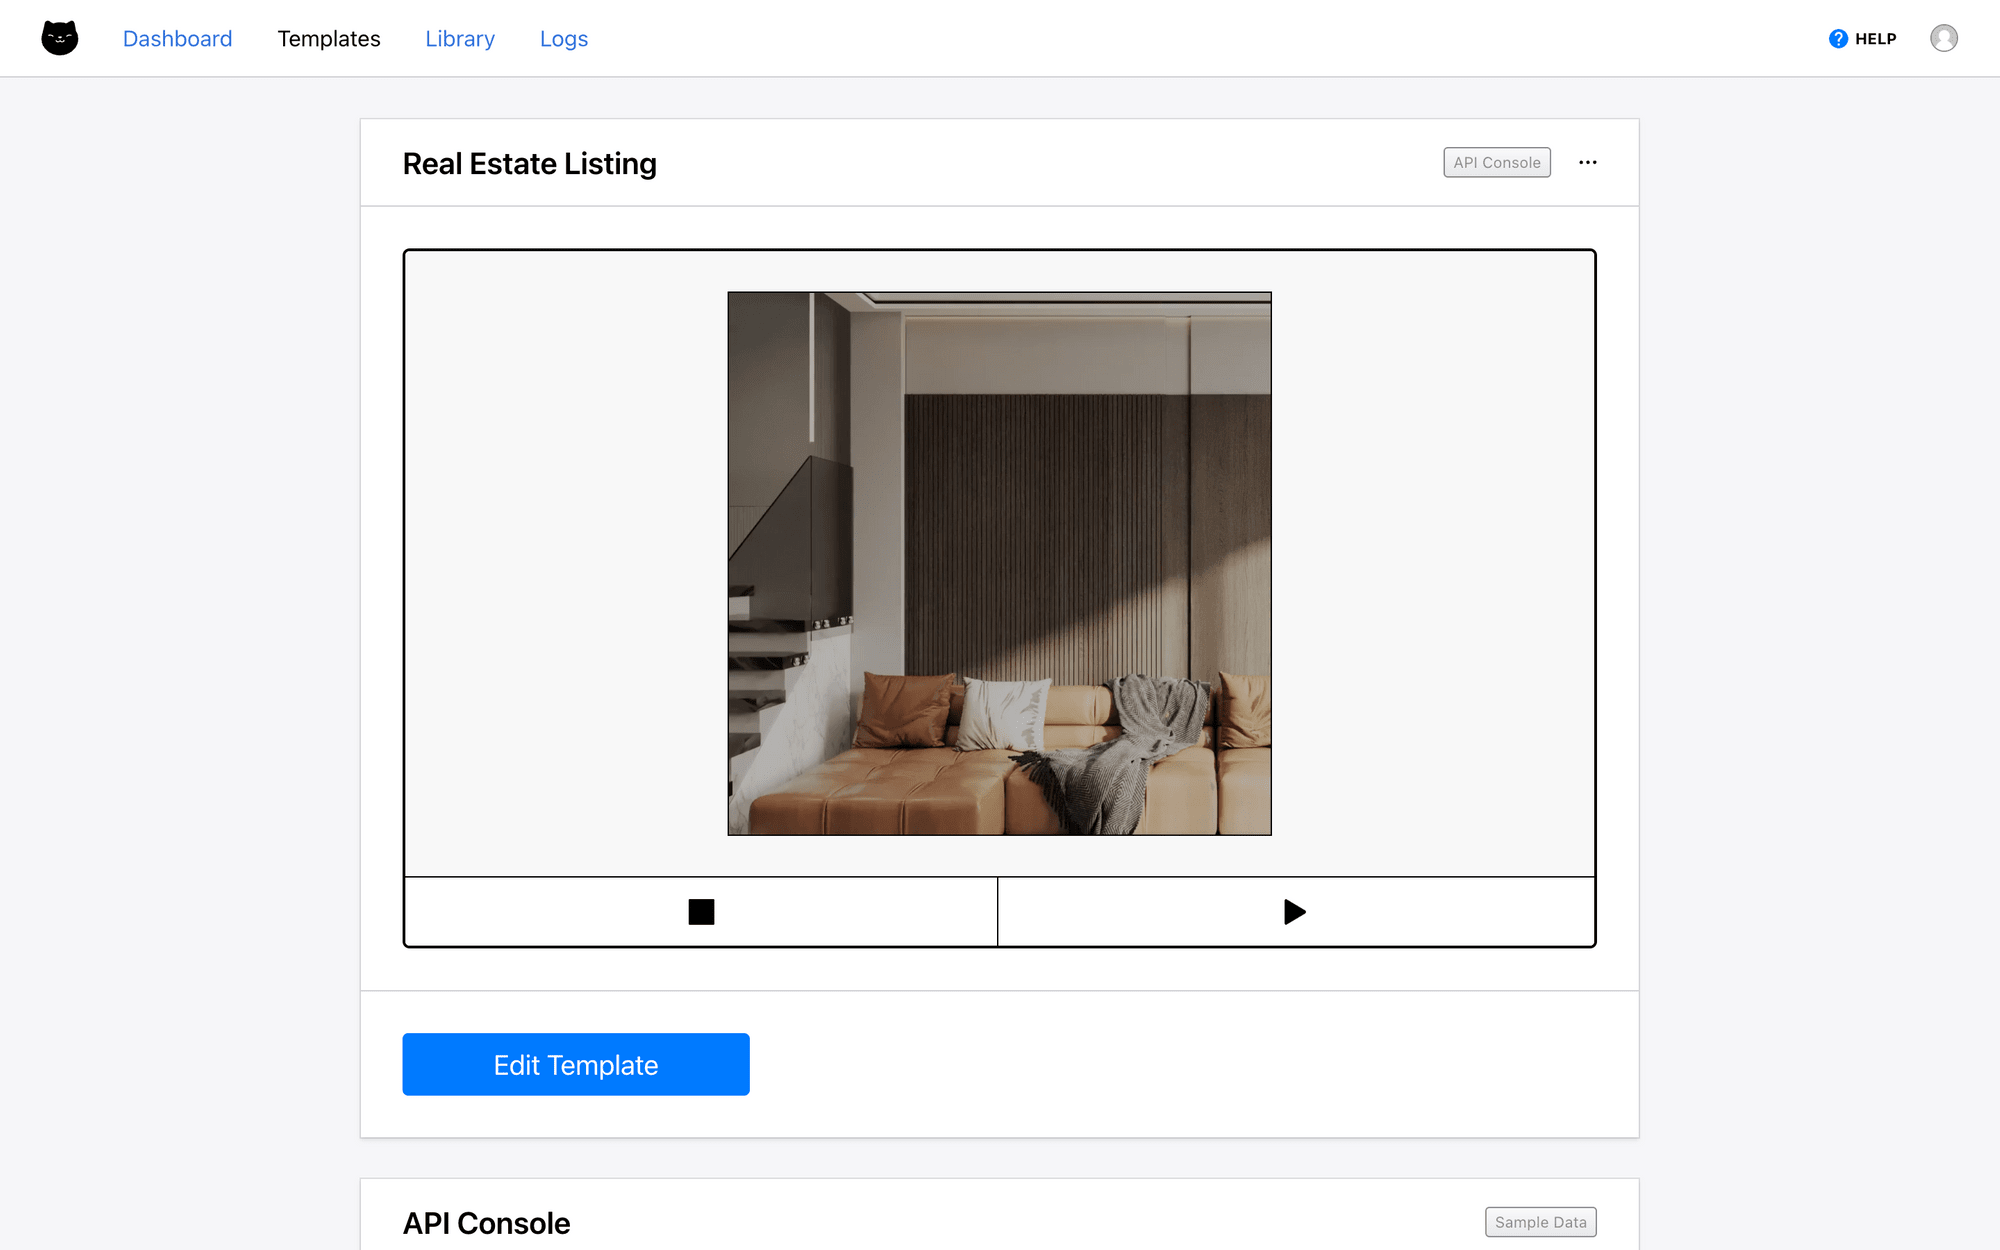
Clicking Edit Template will lead you to the editor.
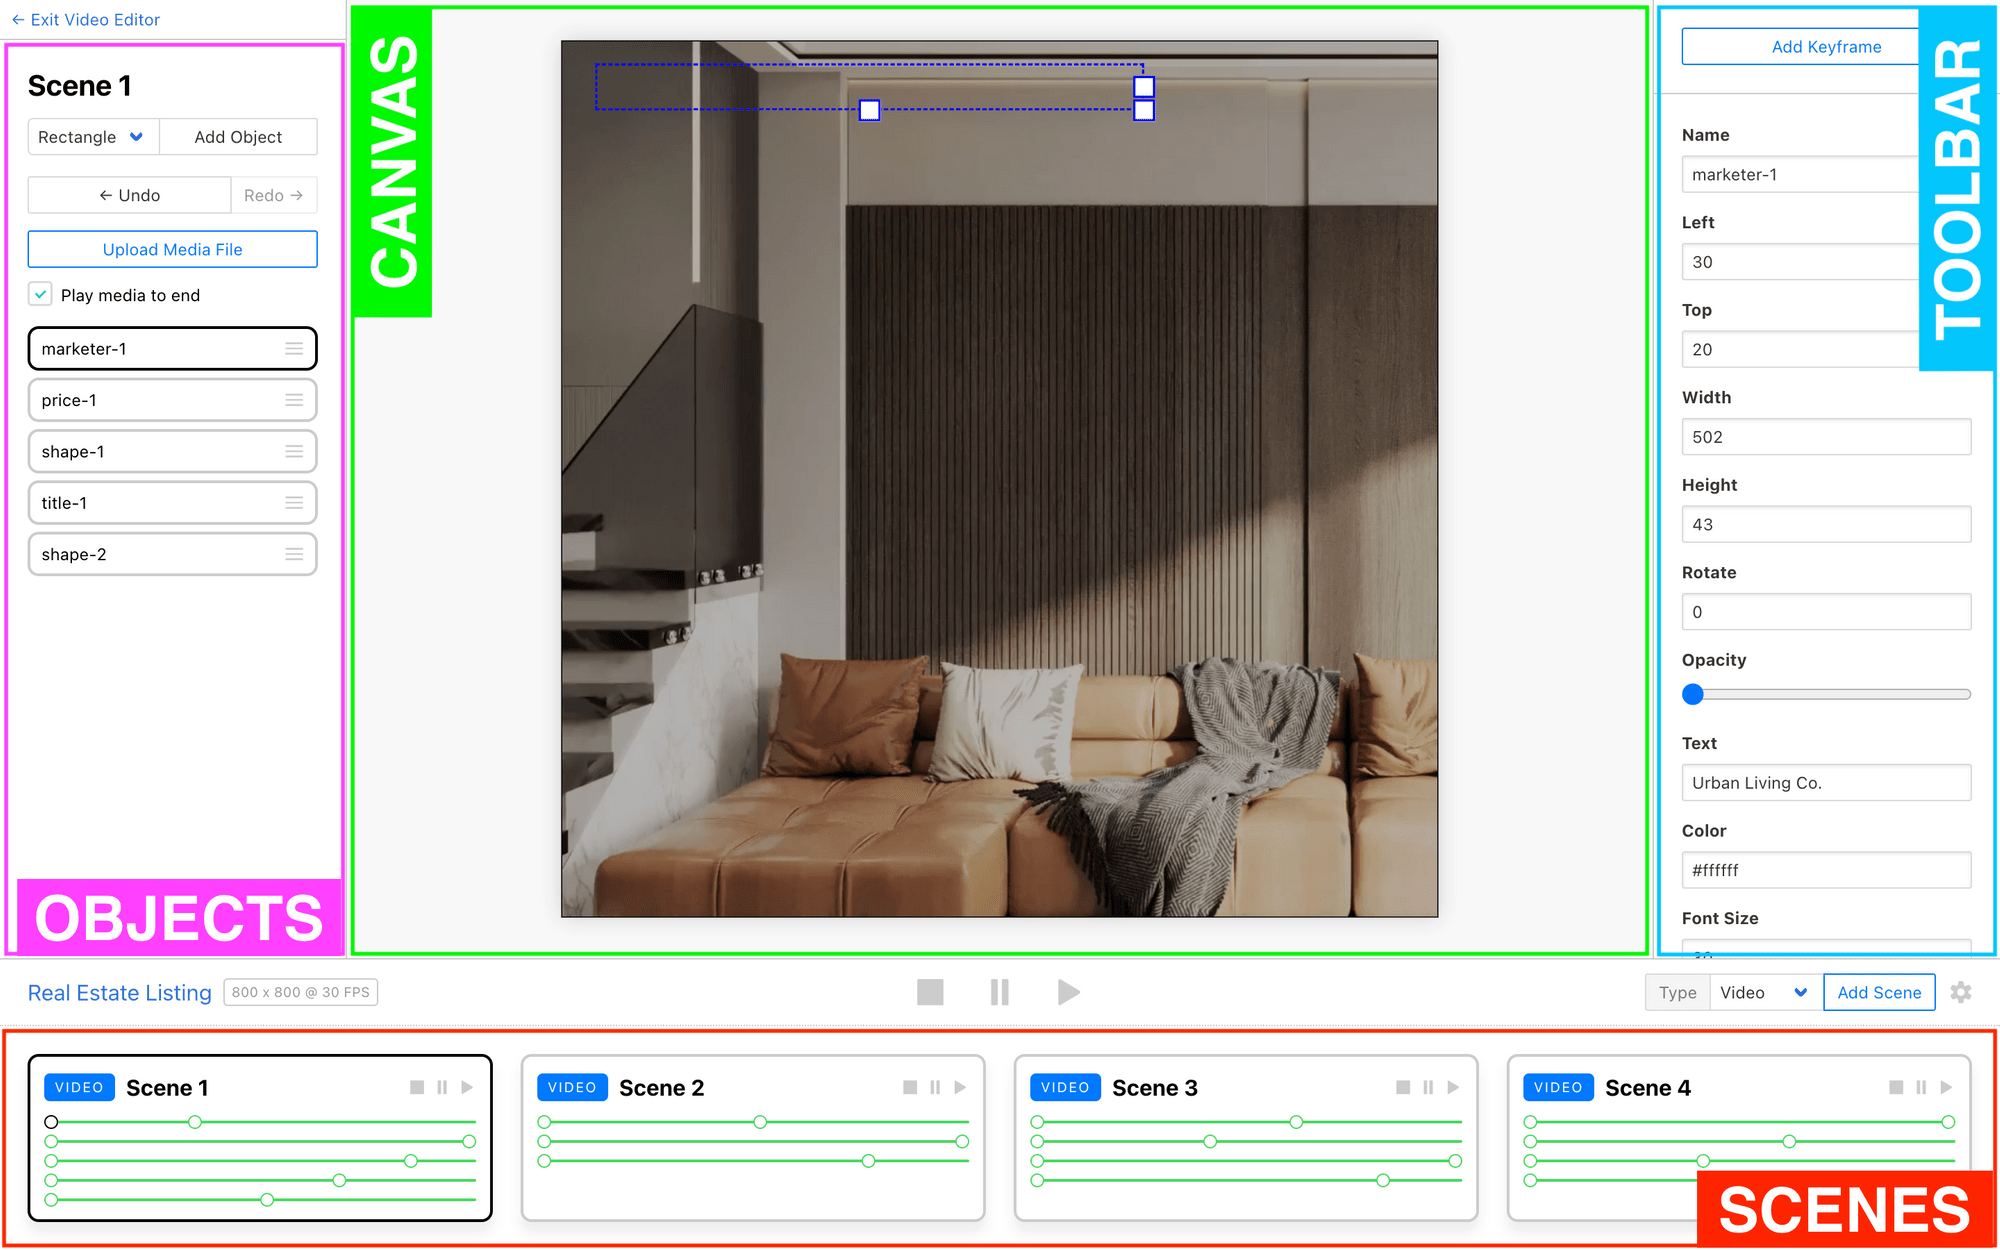
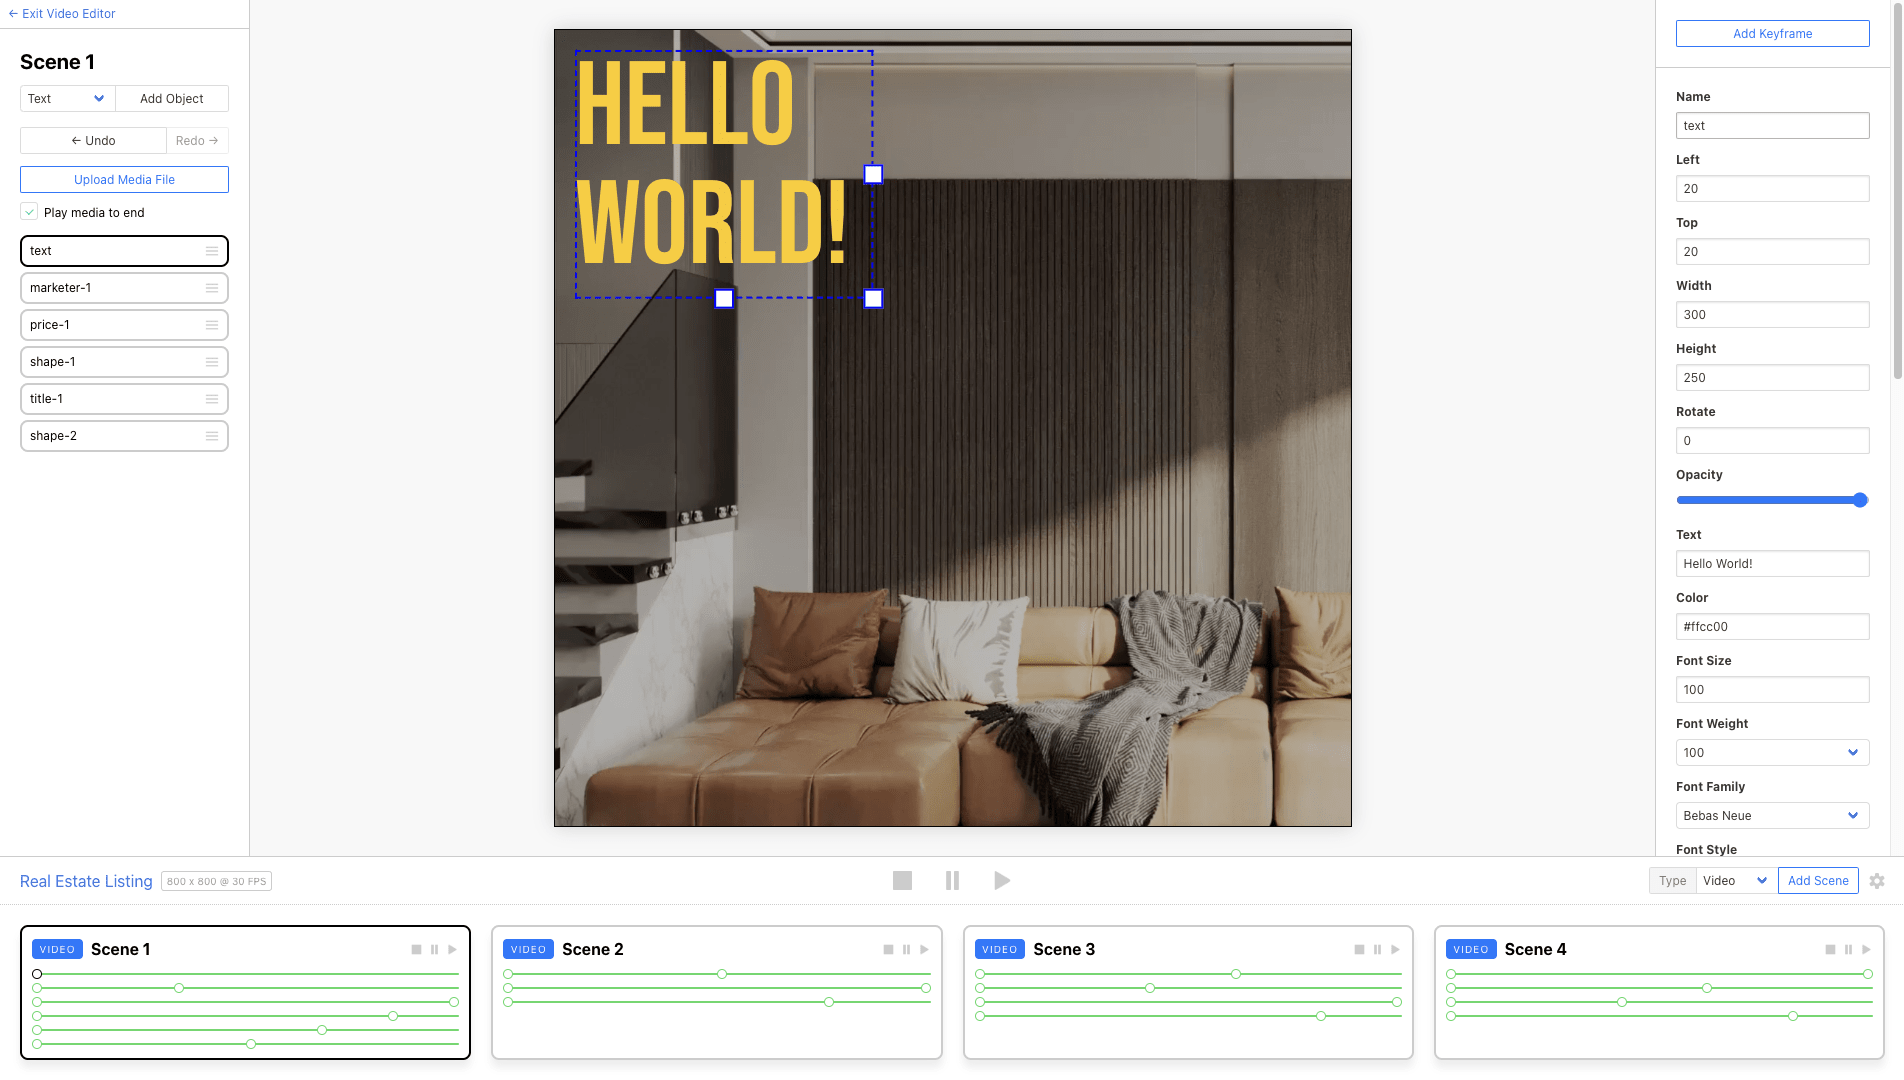
The editor is set up with four main sections:
- Objects : Lists the objects (text, shapes, media) in a particular scene. Can be reordered and deleted from this panel.
- Scenes : Displays the scenes (video or graphic) and keyframes in a template. Can be played, paused, and managed from this section.
- Canvas : Displays the scene in progress and allows for drag-and-drop editing.
- Toolbar : Shows the customizable features of an object, such as position, opacity, color, content, keyframes, and more. Can be modified from this panel.
If you’re working with a template from the library, these will come pre-loaded with settings that you can modify if needed.
3 - Set Up the Template
New templates are set at 800×800 resolution and 30 FPS. This can be adjusted from the editor by clicking the current resolution on the playback panel.
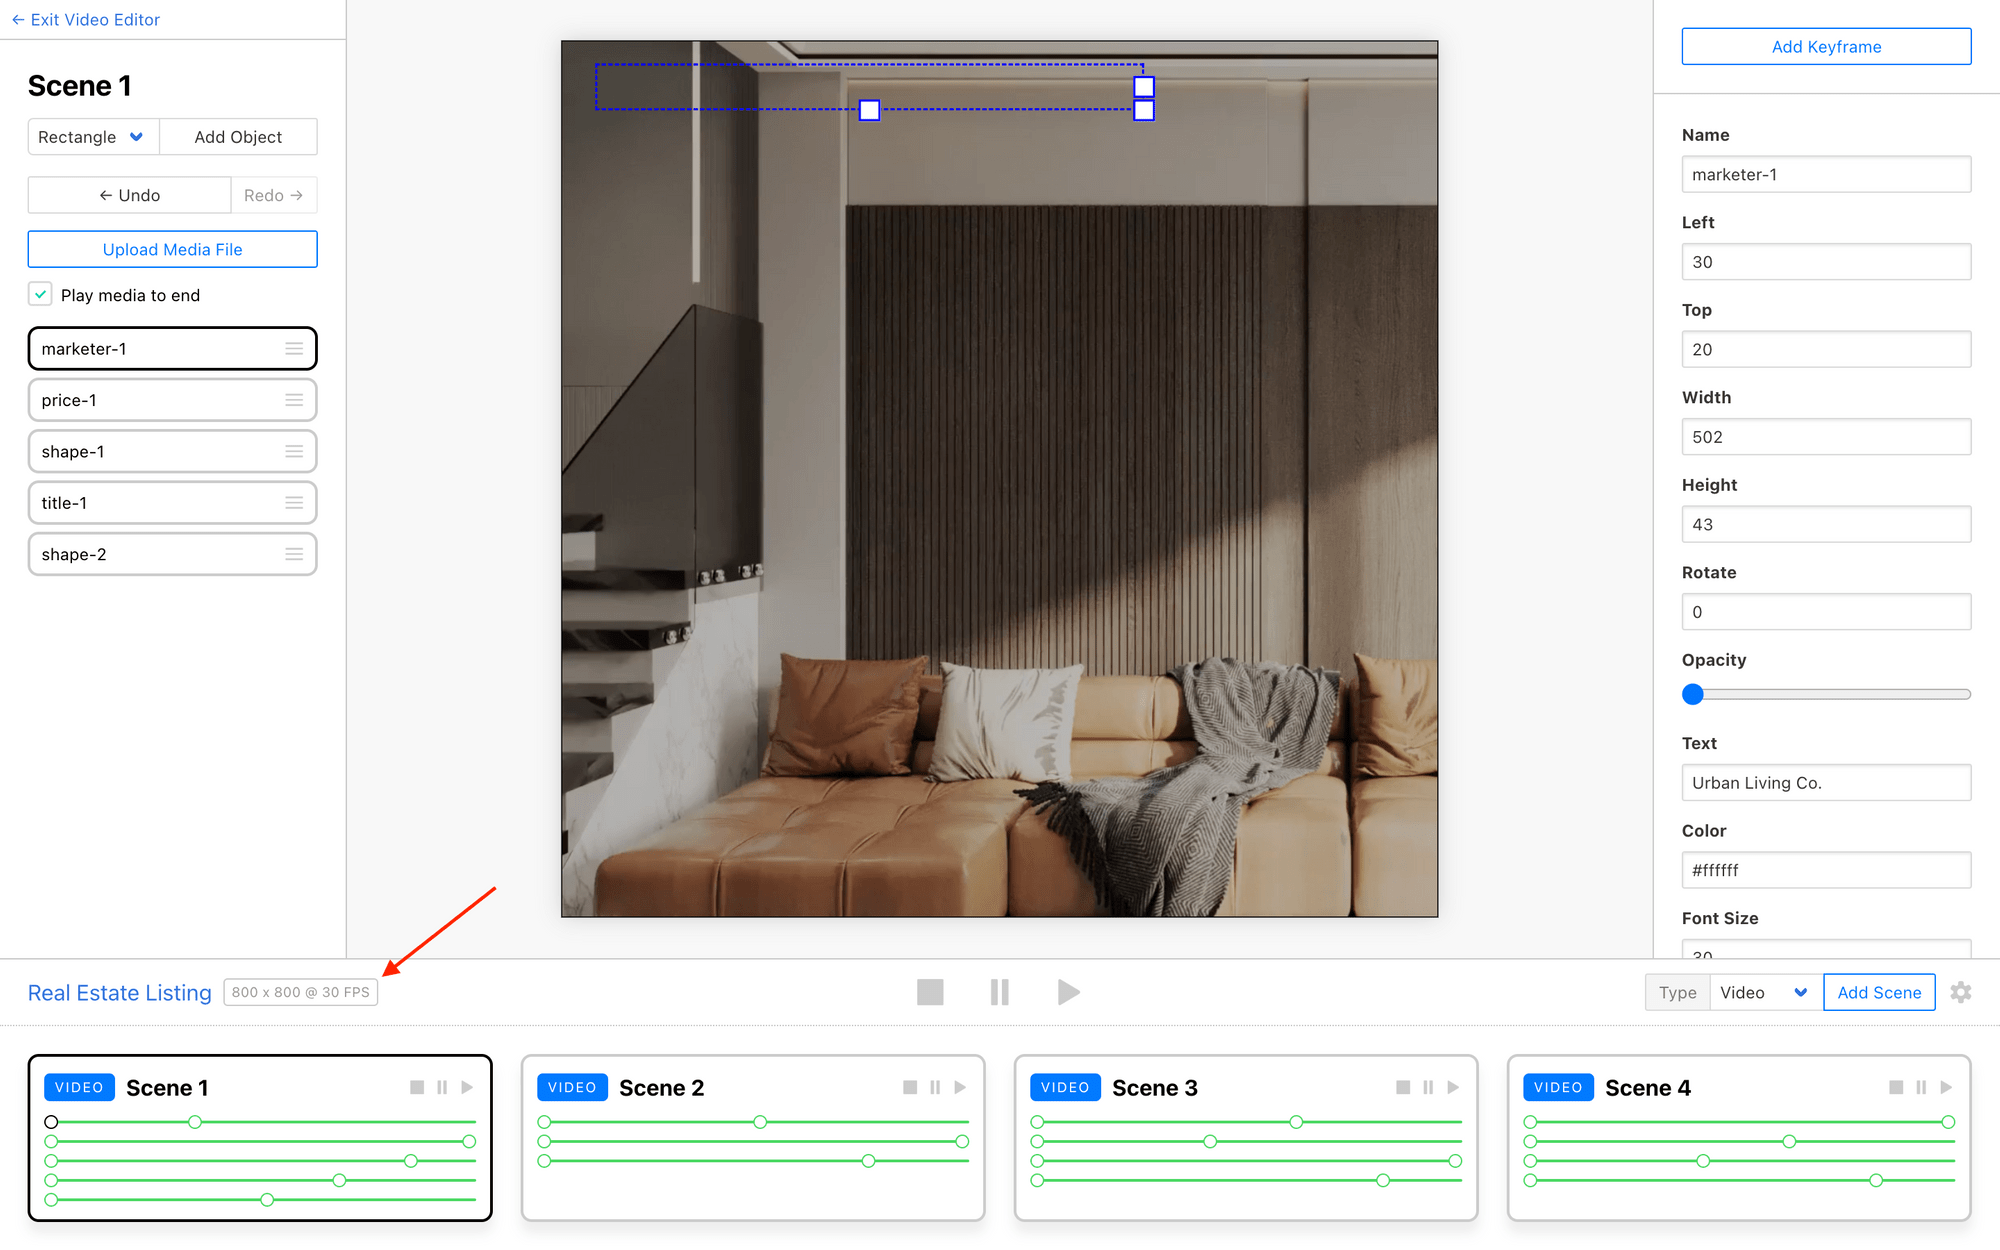
This opens a settings page where you can rename the template, change the canvas size, and adjust the frame rate.
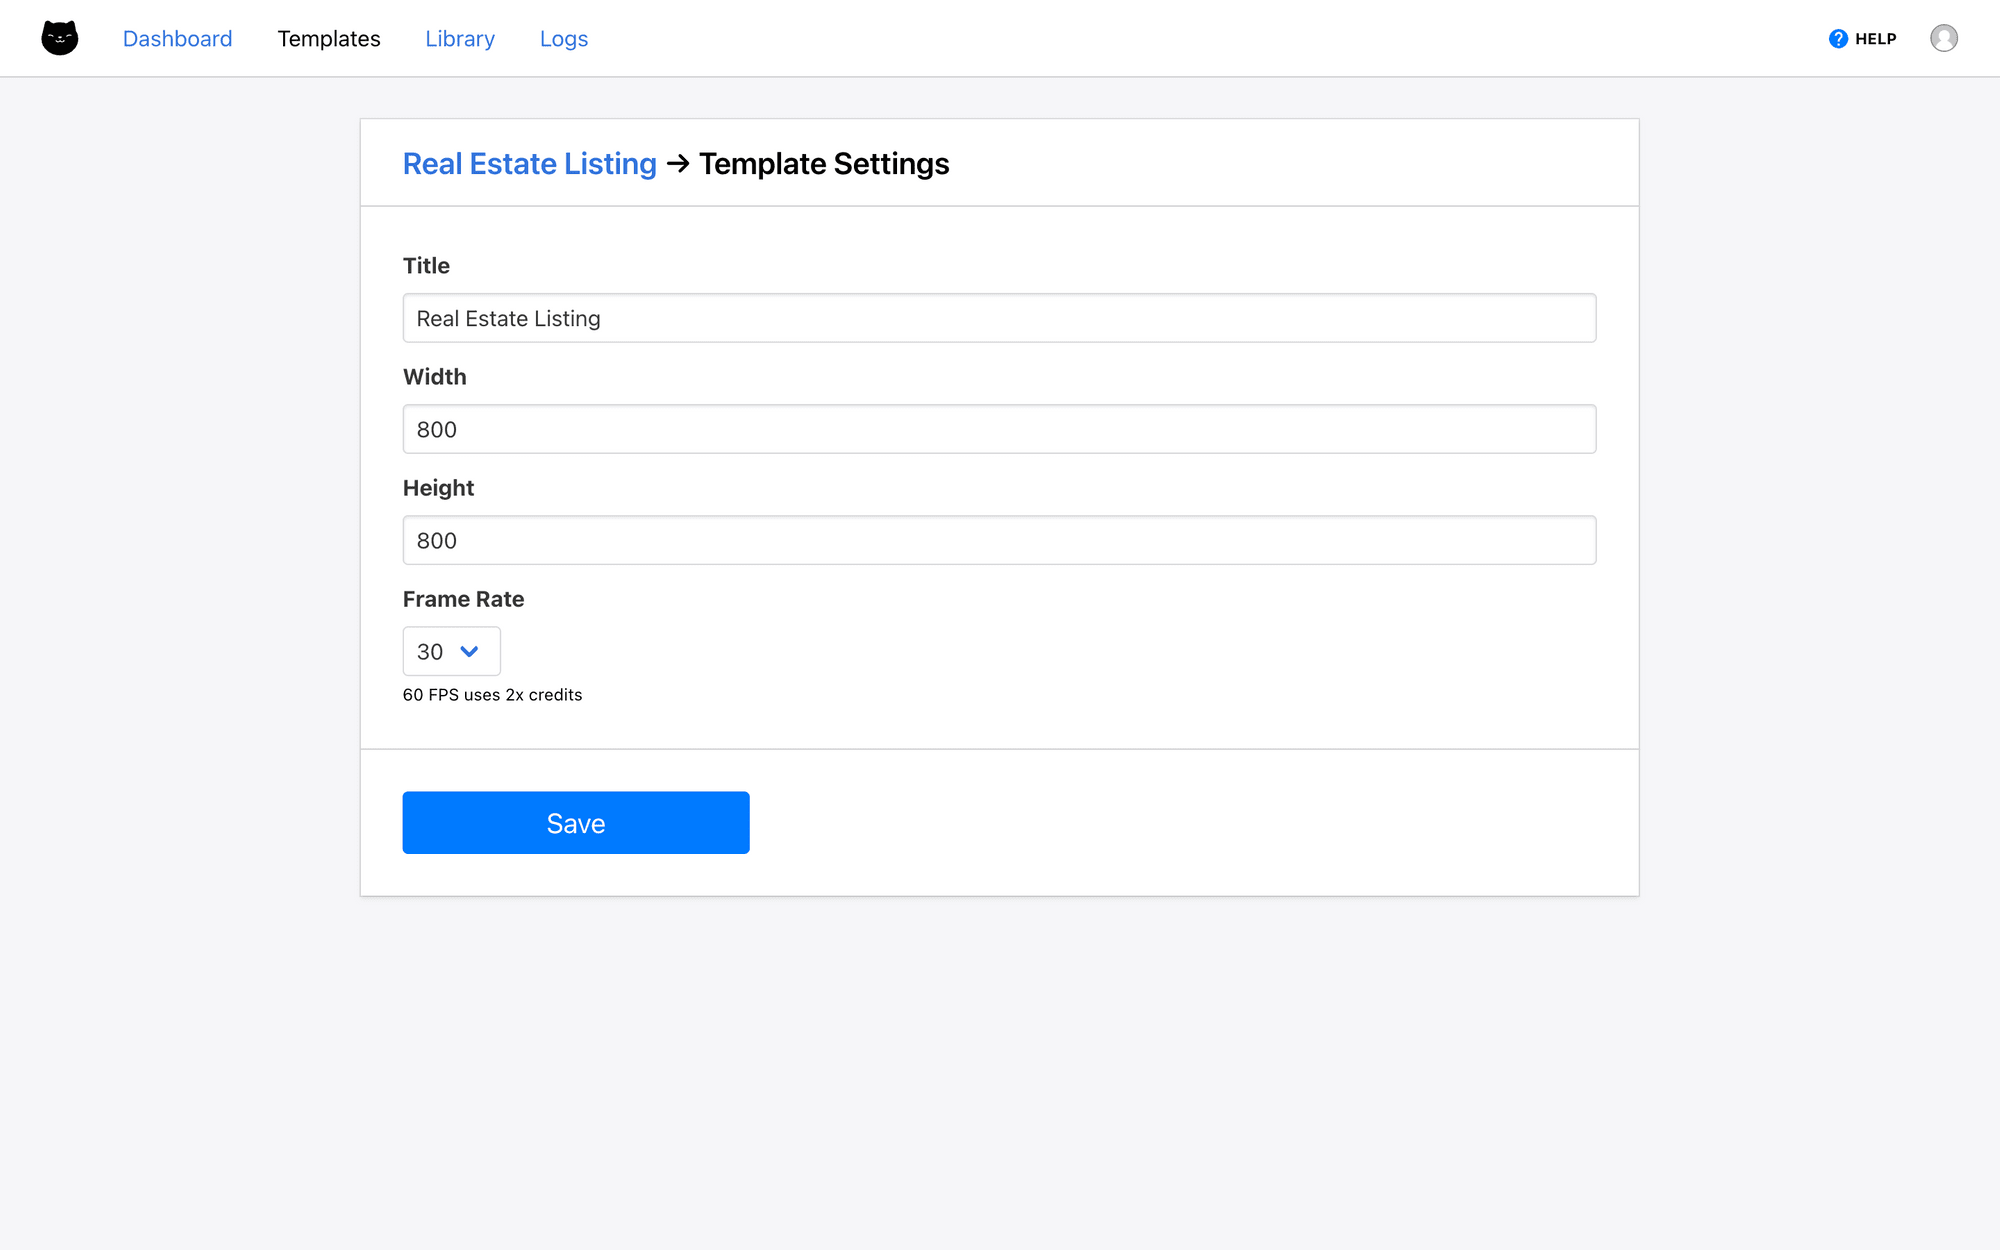
Click Save when you’re happy with your changes.
4 - Customize the Template
Now, it’s time to customize your template to fit your needs. You can do plenty of things with the editor, such as:
Create a New Object
Select the type of object from the dropdown menu, and click Add Object.
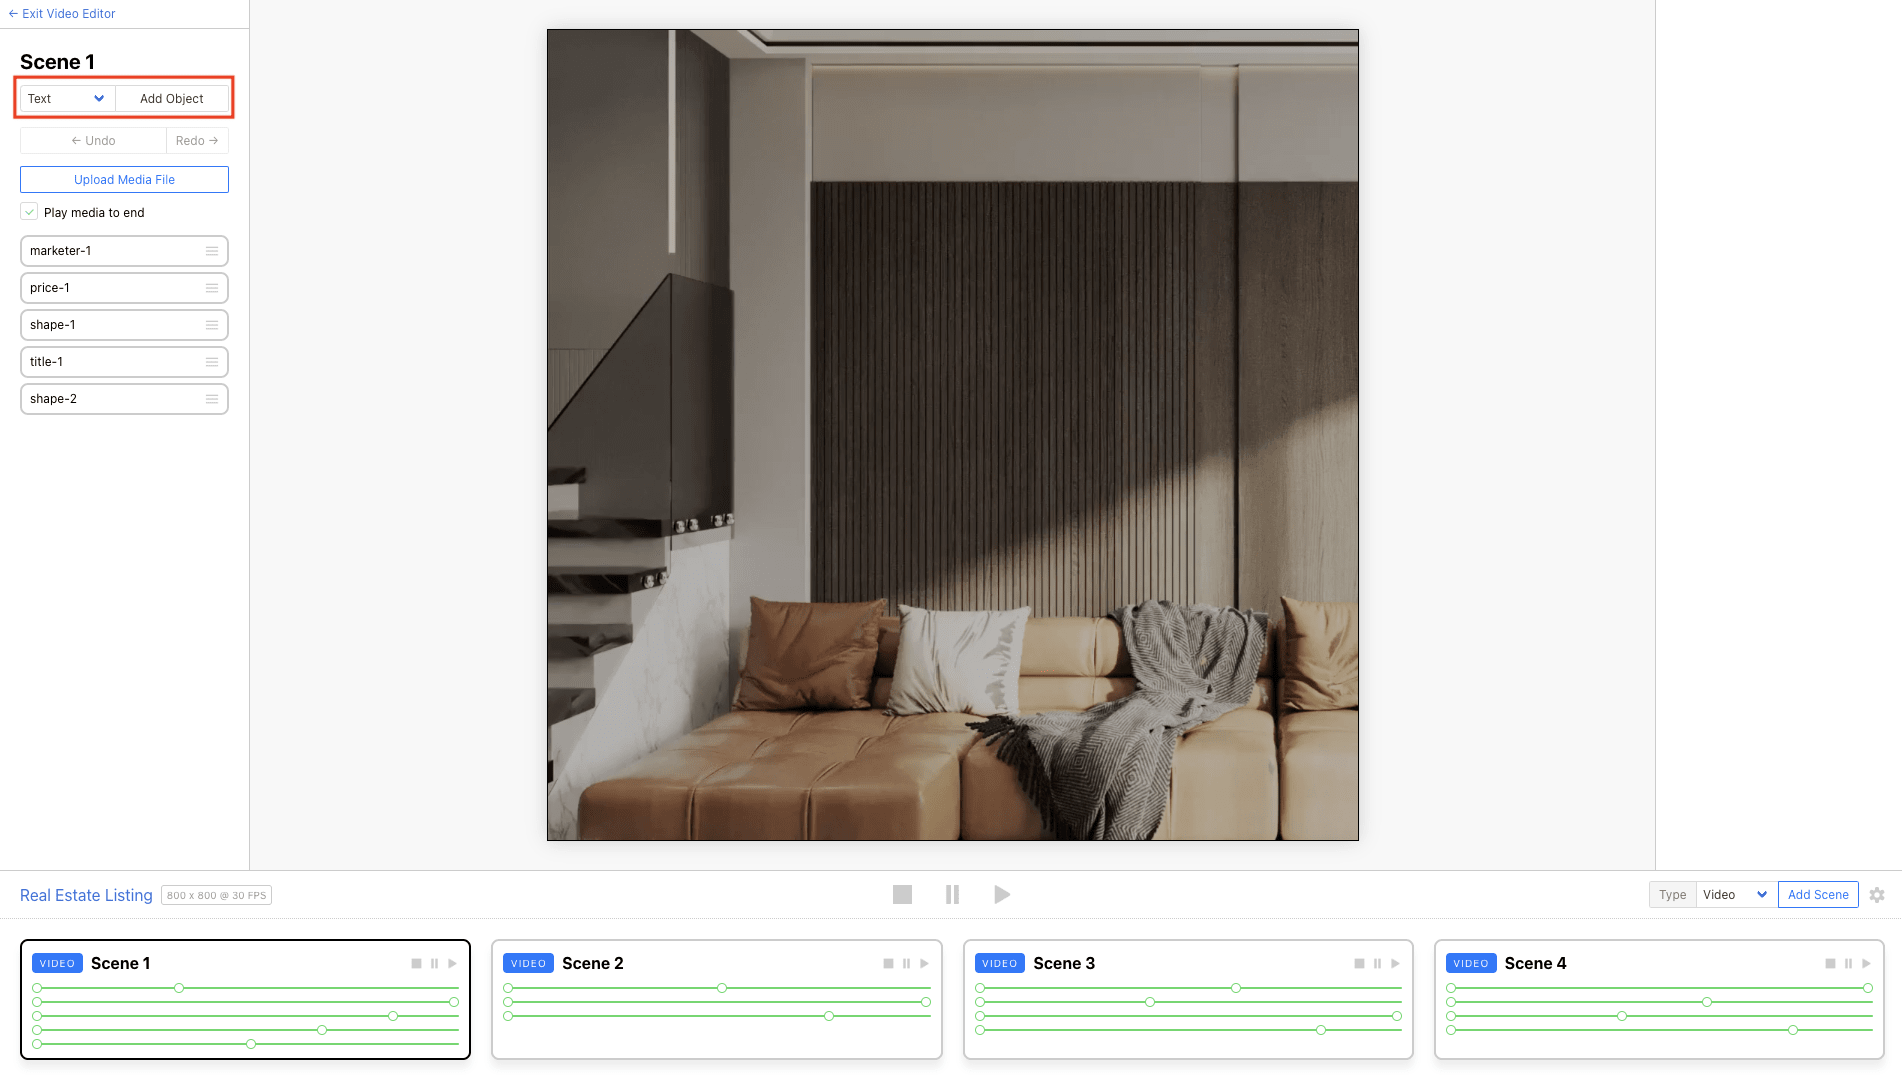
The toolbar will now appear with plenty of customizable areas, such as position, size, opacity, and content.
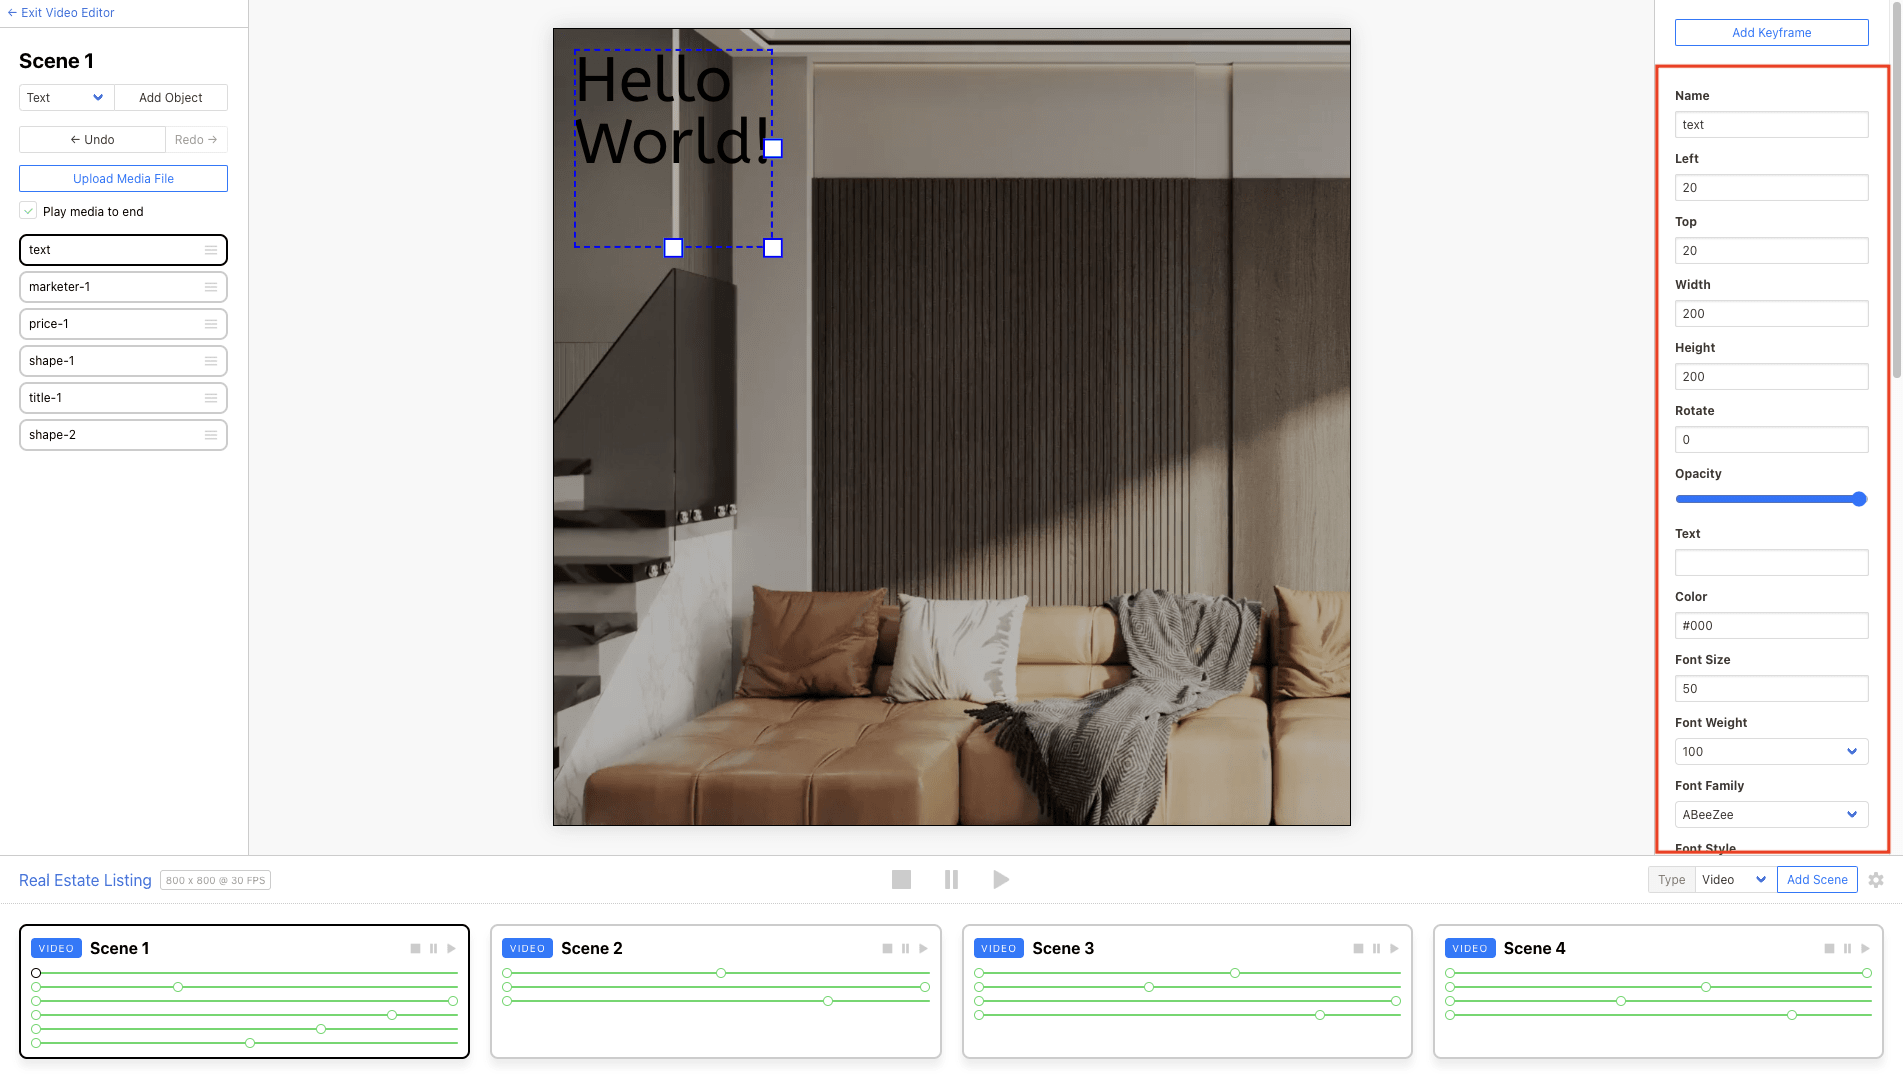
You can adjust these until the object is to your liking.
Add a Keyframe
Keyframes are specific moments where you have defined the specific properties of an object, such as position, rotation, or scale. By specifying where you want an object to be at a certain time, objects can be animated to smoothly move from one position to another.
Set this up by ensuring your chosen object is selected, then click Add Keyframe in the toolbar.

Now, specify the conditions for the keyframe. This might be a different position, scale, rotation, easing, or so on.
Meow Memo 🐱: Our guide to animations will help you learn how to apply different seamless effects to your objects.
Playing the scene should show you how the object moves from one keyframe to the next.
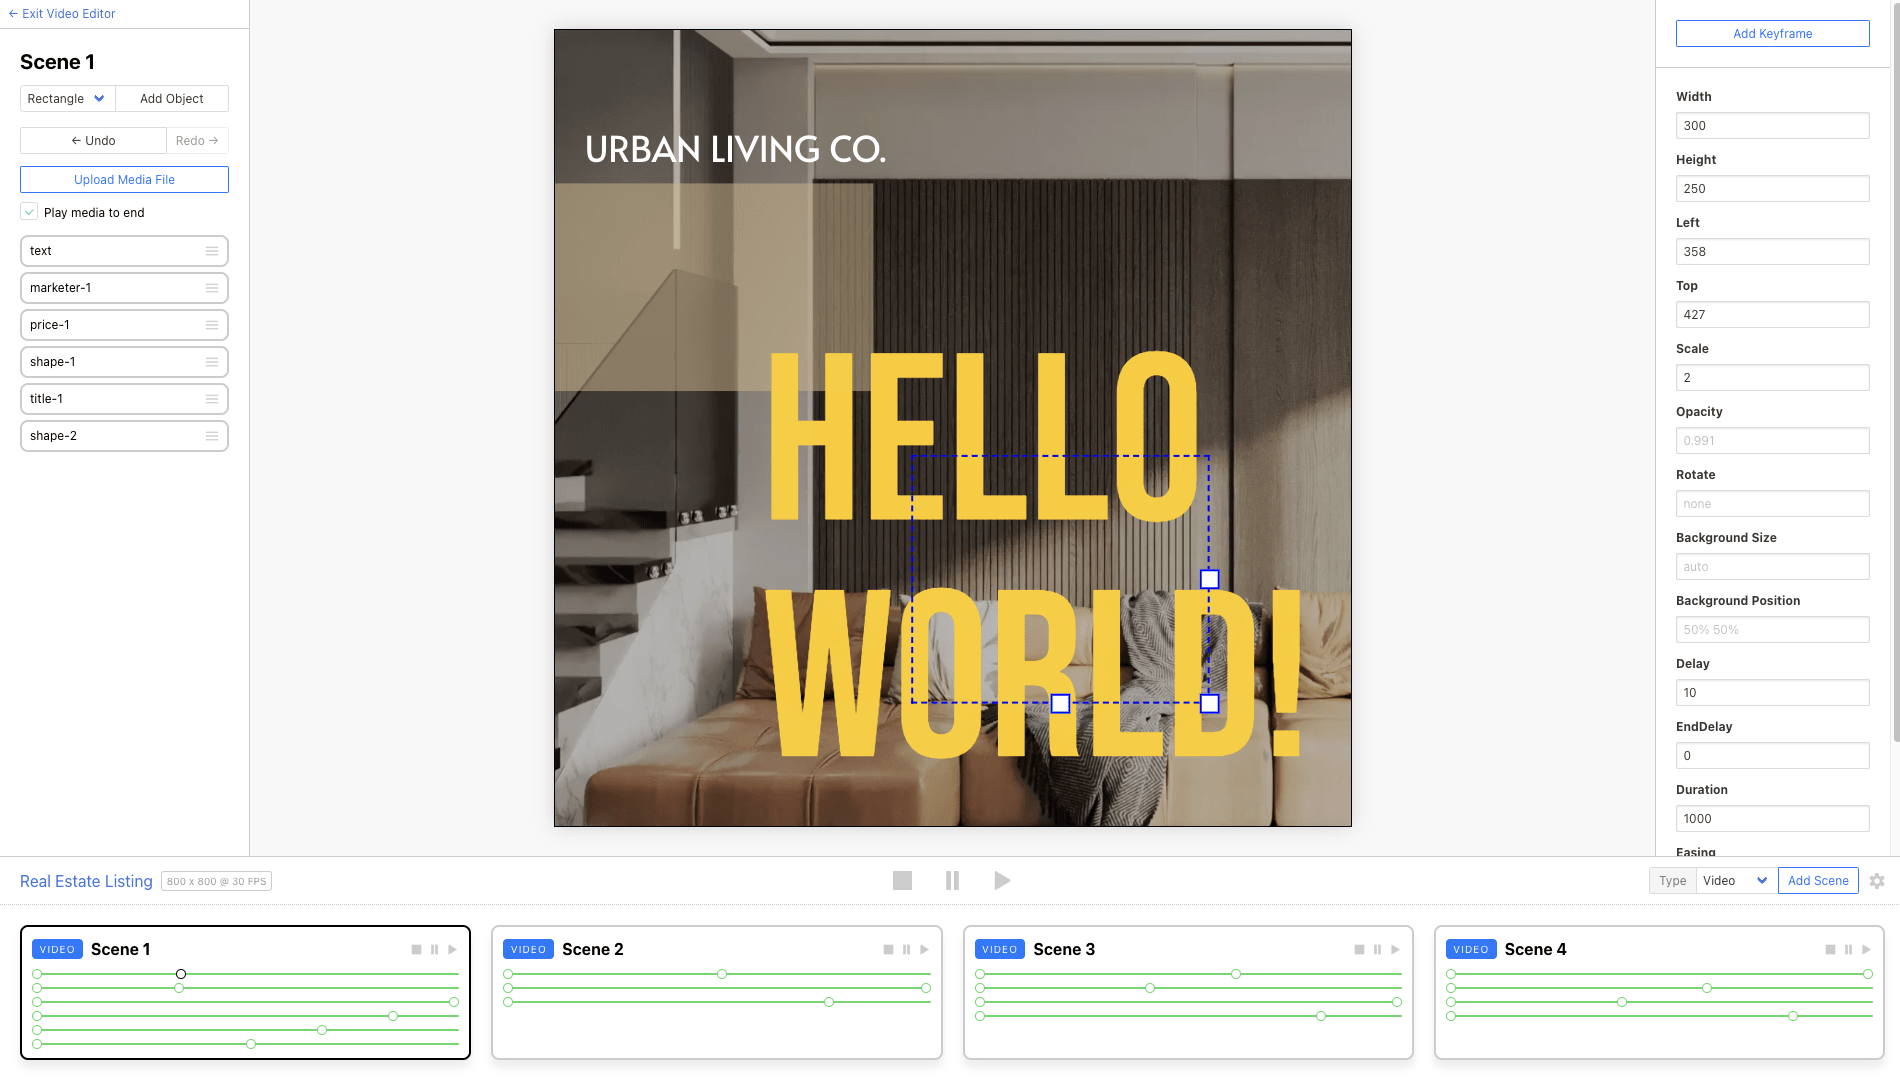
Clicking the circle icon associated with the object in the scene will open the toolbar for that object’s keyframe, allowing you to make edits.

Meow Memo 🐱 : Remember that everything in a scene will be interacting with each other, so decide on the duration of each scene before adding objects and keyframes. Durations in Clipcat are measured in milliseconds, meaning a duration of
2000is 2 seconds long.
Add a Scene
Scenes in a Clipcat video are completely different video segments where you can work with separate sets of objects, keyframes, and durations. You can have one or as many scenes as you want in a video.
To add a scene, specify Video or Graphic in the dropdown menu on the right side of the playback panel. Click Add Scene.

You can also click on the gear symbol to manage and delete scenes in your template.
Making adjustments to these elements will eventually leave you with a final template that’s ready for data input and video rendering.
Conclusion
Video templates are a strategic approach to content creation that can dramatically streamline your production workflow. By investing time in thoughtful template design, you can transform repetitive tasks into efficient, scalable processes that maintain high production standards across all your video content.
Tools like Clipcat make this easier than ever, offering you the flexibility to build, customize, and automate video generation with minimal manual intervention. As the digital content landscape continues to evolve, embracing template-based workflows isn't just smart—it's essential for staying competitive and reserving creative energy for the strategic work that needs you most.